|
Now I don't want to brag, but my 308 looks badass. Even parked next to other 308s it draws attention. And it makes Corvettes invisible. One of the reasons why is because the car has been lowered. Not lowered an obscene amount so it looks ridiculous, just about an inch or so lower than stock to get rid of the odd looking wheel gaps that the stock suspension has. (I call it the 4x4 look). So my 308 looks mean. This article will teach you how to do this to your 308 for surprisingly little money.
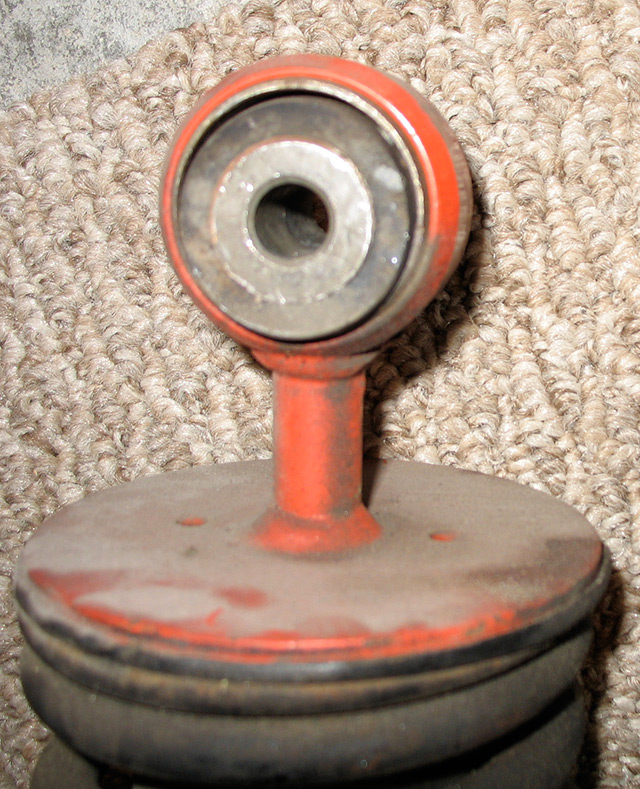
BACKGROUND Many people had been installing QA-1 shocks in the car, but there was one major issue with aftermarket shocks interfering with the front suspension arms. As you can see in the picture below, the stock Koni front shock has an "extension rod" between the mounting hole at the top and the shock body. I call this feature an extended shock mount.
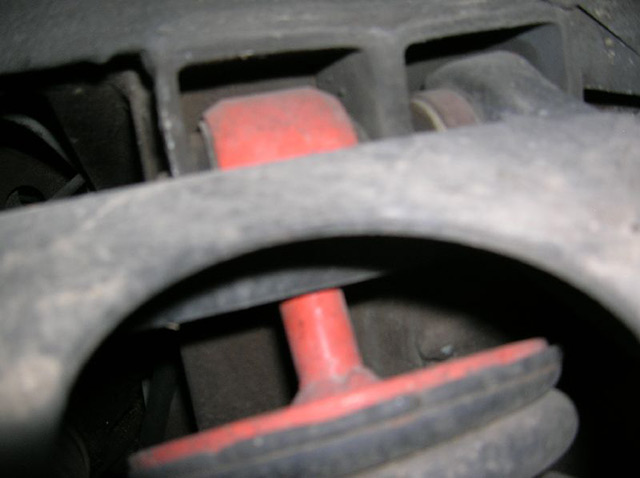
The purpose of that extension is to clear the front A-arm as shown in the following picture that I borrowed from Fchatter Tillman (thanks Tillman!) You can see how the A-arm rests against the shock eye extension when the suspension is drooping (car lifted) but the spring perch is much below the A-arm, well out of the way. The QA-1 the spring perch would be right where the A-arm is, so the shock wouldn't fit.
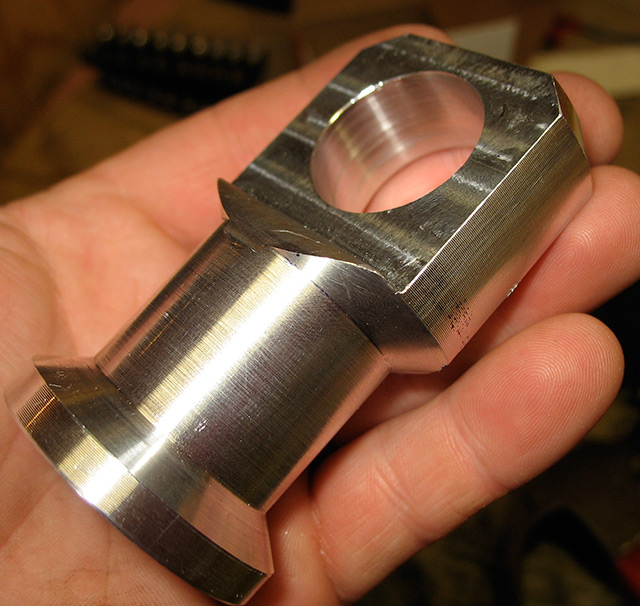
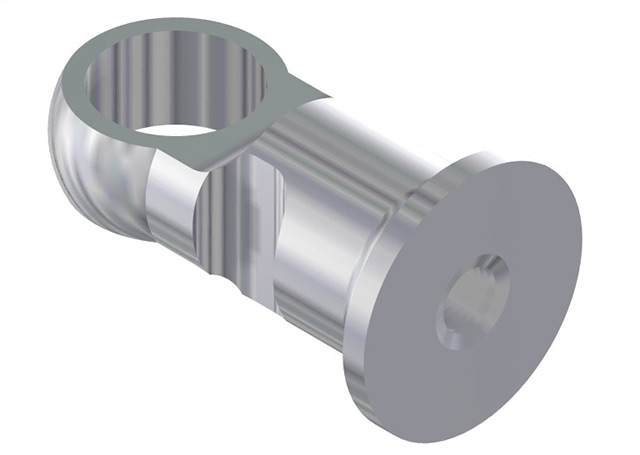
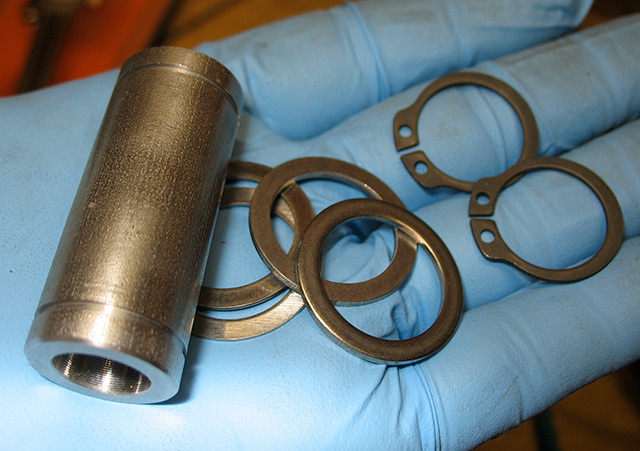
What people were doing to put QA-1 (or any other off-the-shelf coilover shock) in the 308 was actually cutting away a rounded section of the A-arm so it wouldn't interfere with the shock! Yikes! There is no way it's a good idea to mangle suspension components. First of all, it's not safe. Second of all, that is irreversible damage to the originality of the car. So I decided to build an extended shock eye for the QA-1 that would allow a standard, reasonably-priced shock to work without modifying the car. (Incidentally, this is only an issue in the front. In the rear, the QA-1 shocks work fine without any modification). In the following picture you can see a standard (rear) QA-1 shock assembled. At the right side of the picture, the non-extended standard shock eye. It unscrews from the shock. My plan was to create a longer one to replace it with, so the shock would fit in the 308 front suspension without modification.
When I told my friend Verell (local Ferrari guru at Unobtainium Supply Co) about my idea, he offered to help with the idea. If the project worked out OK, he would have a run of them made to sell as a kit for others to follow in my trailblazing path! :-) So I bought some 7075 aluminum, made some measurements and got to work on a lathe. Then Verell helped with some milling machine time to finish it up and we came up with something like this:
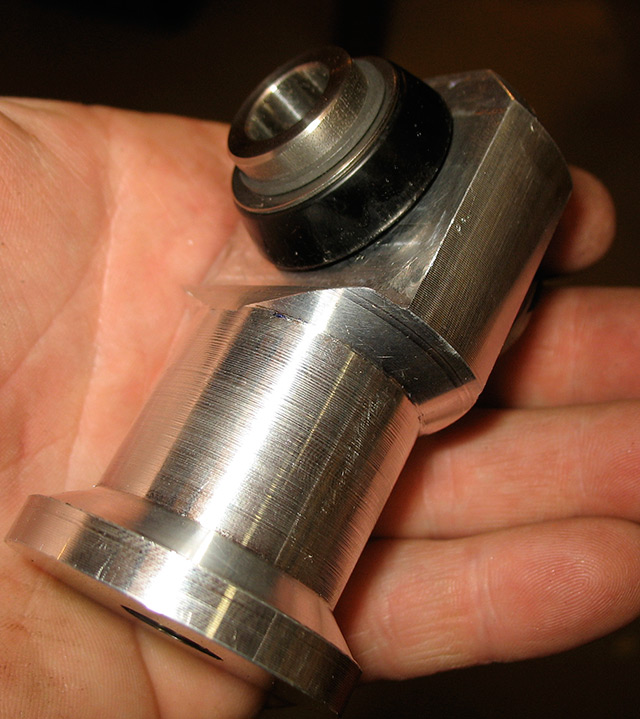
Fortunately, Verell had been making a bushing kit for the QA-1 for a couple years, so he already had those parts. You need a bushing kit because you need to adapt the generic polyurethane shock eyes on the QA-1 shocks to the specific metric mounts on the 308 suspension arms. Once we transferred the polyurethane bushing to my new extended shock eye and installed Verell's bushing kit, it looked like this:
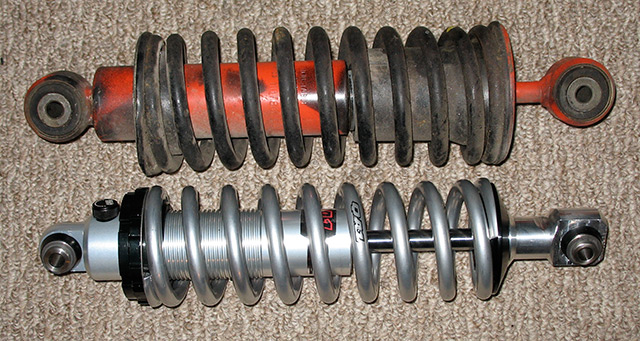
With the extended shock eye installed on the QA-1, it looks like this, sitting next to a Koni:
Interestingly, both front and back QA-1 shock/spring assemblies are about 2.5 pounds lighter than stock. So in total, this makes the car 10 pounds lighter. Not a lot, but most of that is unsprung weight. After we had installed the shocks in my car, verified that the lengths were right, set a good ride height and broken it in for a while, Verell took my measurements, made a CAD drawing and had the extended shock eyes made.
When you order them, the part number is "paper weight"--for legal liability he does not actually sell suspension components. ;-) If you want to read the long, detailed, painful, step-by-step process of developing this system, you can read it here. I WANT TO DO IT! WHAT DO I DO?
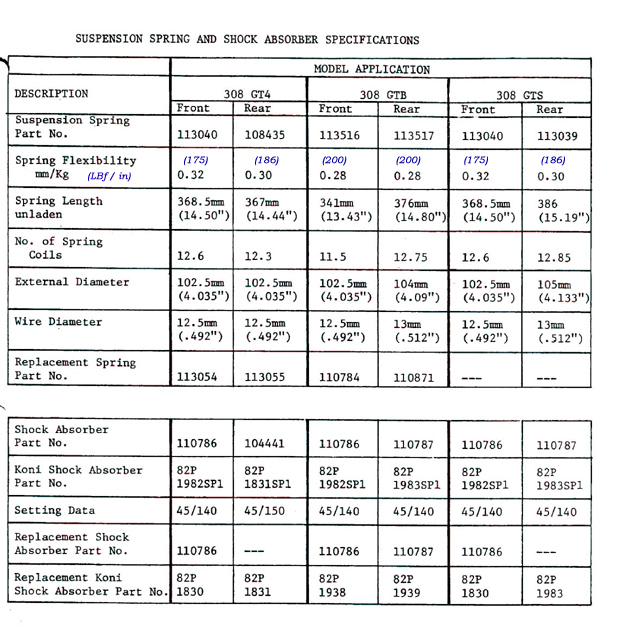
At the time of this writing in 2015, the prices are approximately: $160/shock (x4) = ~$640.00 Total cost: $1,170.00 SPRING RATES
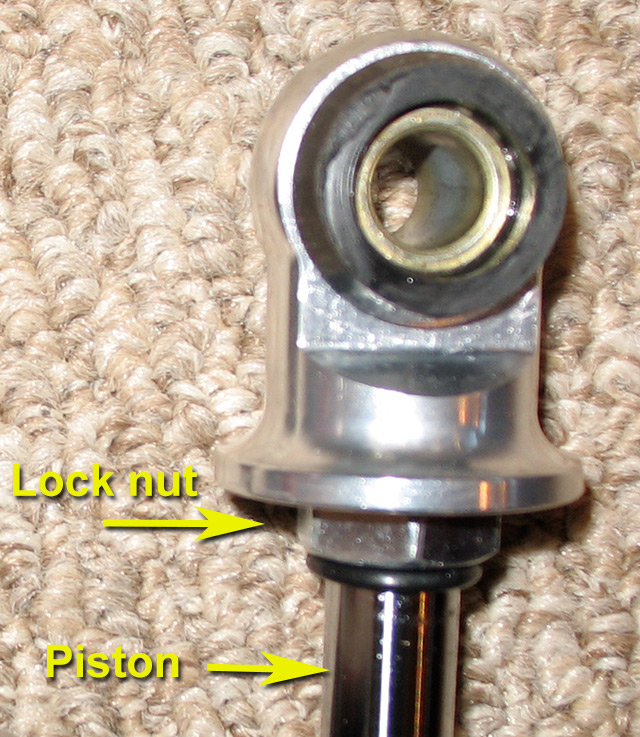
Take the GTS for example...the fronts are 175# springs (sloshy!) and the rears are 186#. You will also see that the GTB is sprung a tiny bit stiffer than that (200# on both ends) but still way too soft. In talking to the racing crowd, I learned that the fronts need to be quite a bit stiffer than that, and the rears somewhat stiffer. I have seen people go as high as 400# in the front and 350# in the rear. Most people seem pretty happy with 300# in the front and 250# in the rear for general road use, so that is how I ended up with the recommended spring rates. I have been very happy with my choice. I also have my shocks set right in the middle of their damping range. Not too much damping, not too little. A huge difference in handling. And I was able to set a low ride height for that badass look but not have it scrape the ground on every single bump. That being said, the 308 is already a low car. When you lower it another inch, it's really low. You need to be super careful on steep inclines (driveways), speed bumps, raised manhole covers....etc. The reason the rear springs are longer (12") than the fronts (10") is because the shocks are different lengths. The shocks are different lengths because when you add the extended shock eye to the front shock, the whole assembly would be too long if you used the same length shock required for the back. Note that spring length and spring rate are separate numbers. You can get a 10" spring in 250#, 300#, #350#, etc. PUTTING IT ALL TOGETHER 1. Remove the standard upper shock eyes from the front shocks. To do this, unscrew the locking bolt, then just unscrew it. You may have to hold the piston of the shock in some pliers with rubber to keep from marring the metal. If you dent the piston, the shocks will leak and die shortly thereafter, so be careful and hold the piston as high up as you can, away from anywhere the seal in the shock body is likely to slide over. Unfortunately, the piston spins freely in the shock. Very annoying. Here is a pic to show the parts.
2. Using your press, push the polyurethane bushings out of the shock eyes you just removed. Now push them into the Paperweights. 3. Next, using the press, install Unobtainium bushing kits into all 4 shocks, both ends (that's 8 bushings). Each bushing section consists of a tube to go through the poly bushing, a spacer (or two) on each end and a retaining snap-ring clip to hold it all snug. The purpose of this tube is to allow you to crank down on the shock mounting bolts and not collapse the mounts on the suspension and frame.
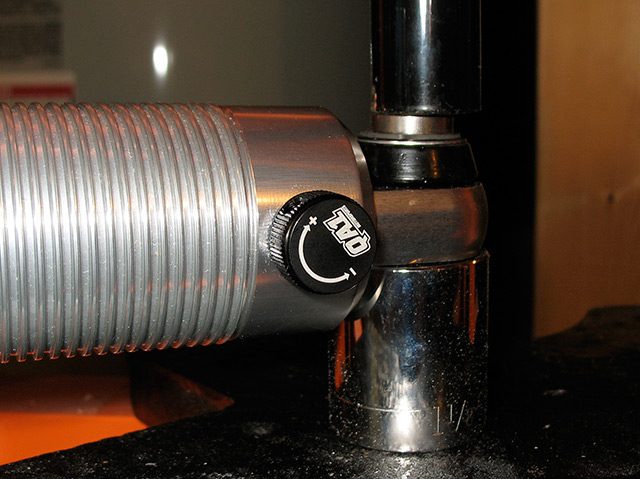
4. Apply some red loc-tite to the threads on the end of the piston and thread on the extended shock eye. (I mean paperweight!) Get it as tight as you can by hand. Then thread the jam nut up to it and get that really tight. Put a wrench on the nut and a big screwdriver through the bushing hole and torque it down. The Loc-tite is very important here, you don't want this thing working its way loose! 5. Now all you need to do is put the springs on the shocks. The rears are easy. The springs are just short enough that you can loosen the shock adjusting rings all the way, put the spring on, and tighten the rings back up. But the fronts don't work out that easily. The springs need a little compression first to get them on. You can do it the dumb way I did with these cheapo, dangerous, crappy spring compressors, but honestly, I feel like I'm living dangerously with these things. If one lets go, the force of that spring could take off a finger. I would suggest just taking them down to your local suspension shop, giving the mechanic $10 and have him use a proper wall-mounted spring compressor to install them. It's so much safer and faster. If it takes him 3 minutes to do both I would be surprised. Please, just say no to this way:
Now get out there and install them in the car. Then set the ride height you want. A few pointers: • The springs will "settle" in a few weeks. My front end settled 3/4" over a couple weeks so take some measurements from the floor to the frame (not the bodywork) before you start and keep measuring it for a while. Adjust as necessary. • I found that I am able to adjust the fronts on the lift with the wheels on, but for the rears I have to remove the wheels to reach the adjusters. Due to the differences between the suspension geometry in the front and the back, I found that: • 1 full turn of the front shock adjuster (360°) equals approximately 1/4" rise in ride height • Lube the spring perches or they squeek as the spring moves. If I were going to do it all over again, I might get the roller-style thrust bearings
|
|
-Birdman |